RecyclerView Tutorial With Example In Android Studio
In Android, RecyclerView is an advanced and flexible version of ListView and GridView. It is a container used for displaying large amount of data sets that can be scrolled very efficiently by maintaining a limited number of views. RecyclerView was introduced in Material Design in API level 21 (Android 5.0 i.e Lollipop).
This new widget is a big step for displaying data in Material Design because the ListView and GridView are one of the most commonly used UI widget. In RecyclerView android provides a lots of new features which are not present in existing ListView or GridView.
Important Note:
In Android, RecyclerView provides an ability to implement the horizontal, vertical and Expandable List. It is mainly used when we have data collections whose elements can change at run time based on user action or any network events. For using this widget we have to specify the Adapter and Layout Manager.

How to create a RecyclerView?
Before we do that we have to add a dependency to the build.gradle.
dependencies {
implementation 'com.android.support:recyclerview-v7:27.0.0'
}
Remember to update the library version to the most recent one. You can check it here.
Now we are able to add a RecyclerView to the layout.

Figure 1. Adding a RecyclerView to the activity_main.xml layout
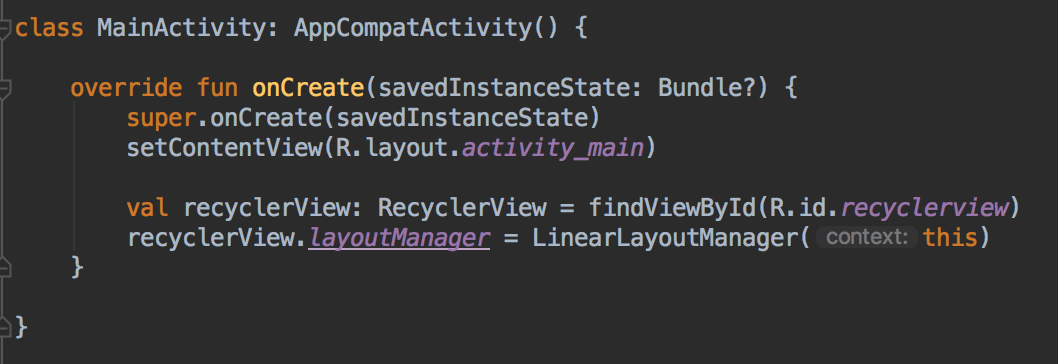
Figure 2. Creating the RecyclerView in the Activity
How to create a list row layout?
In the same way as any other layout.

The list row layout is pretty simple — some image and a text next to it. To make that happen we used LinearLayout with horizontal orientation. Note warning on the LinearLayout. It’s telling us that we should design our layout in a more efficient way.
How to create an adapter?

We have to create a class which extends RecyclerView.Adapter which as a parameters takes a class which extends RecyclerView.ViewHolder. Another thing is to override some needed methods.
What are these methods doing?
getItemCount()returns the total number of the list size. The list values are passed by the constructor.onCreateViewHolder()creates a new ViewHolder object whenever the RecyclerView needs a new one. This is the moment when the row layout is inflated, passed to the ViewHolder object and each child view can be found and stored.onBindViewHolder()takes the ViewHolder object and sets the proper list data for the particular row on the views inside.
The whole code in one piece looks like this.
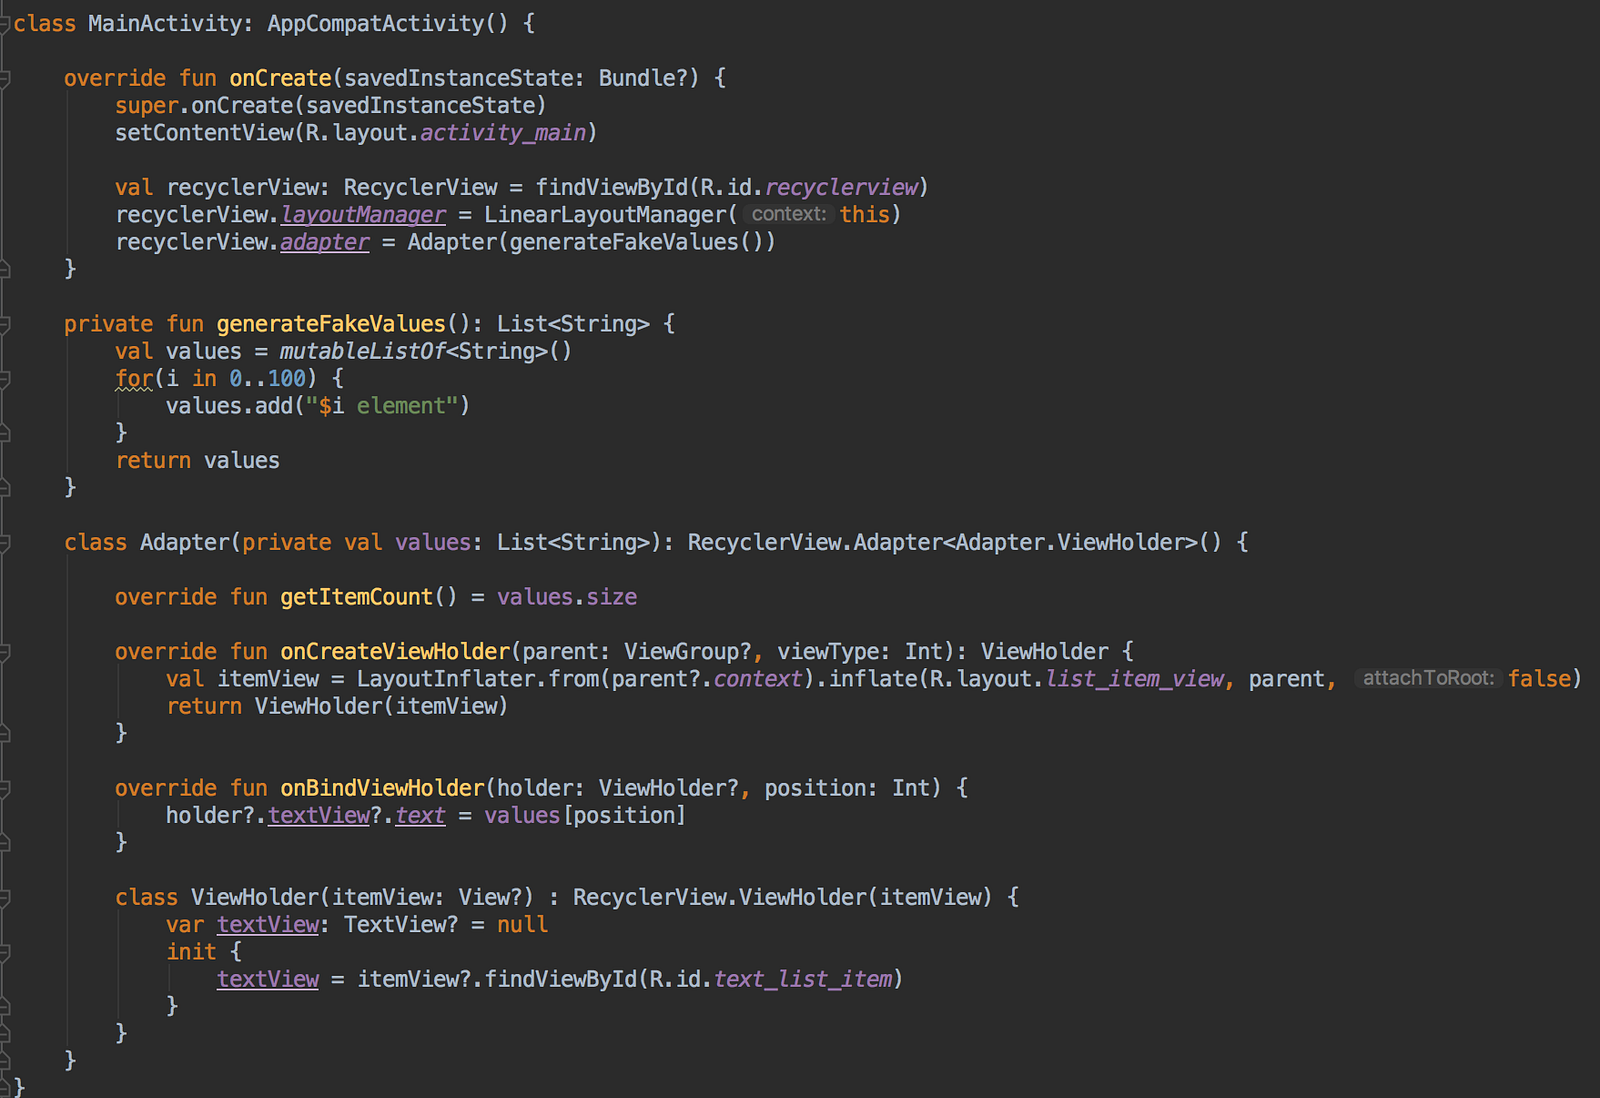
Figure 6. An example of RecyclerView implementation
We can build the project and see the results.

Why we need the ViewHolder pattern?
Long story short, the ViewHolder prevents unnecessary
findViewById() calls on each bind. If you aren’t familiar with this pattern, I encourage you to look at my example of list implementation with the use of a ListView. I believe that this is the best way to know what is going on with this pattern and what are the potential problems without using it.
If the list row layout isn’t inflated for each row, how many times in fact it’s inflated? How many times the
onCreateViewHolder() and the onBindViewHolder() method are called?How RecyclerView reuses views?
To check this we’ll put some logs in our code.

Figure 8. Using Log class to see reusing list elements
Ok, so let’s see what is happening.

As you can see
onCreateViewHolder() method is called and ViewHolder objects are created for a couple of first views and then the created ones are reusing and the adapter is just binding the data with the onBindViewHolder()method. Thanks to that the list is very efficient and user can scroll the list smoothly, because the most costly calls (like inflating and finding views) are happening inside the onCreateViewHolder() method.
This is it!

Comments
Post a Comment